Overview
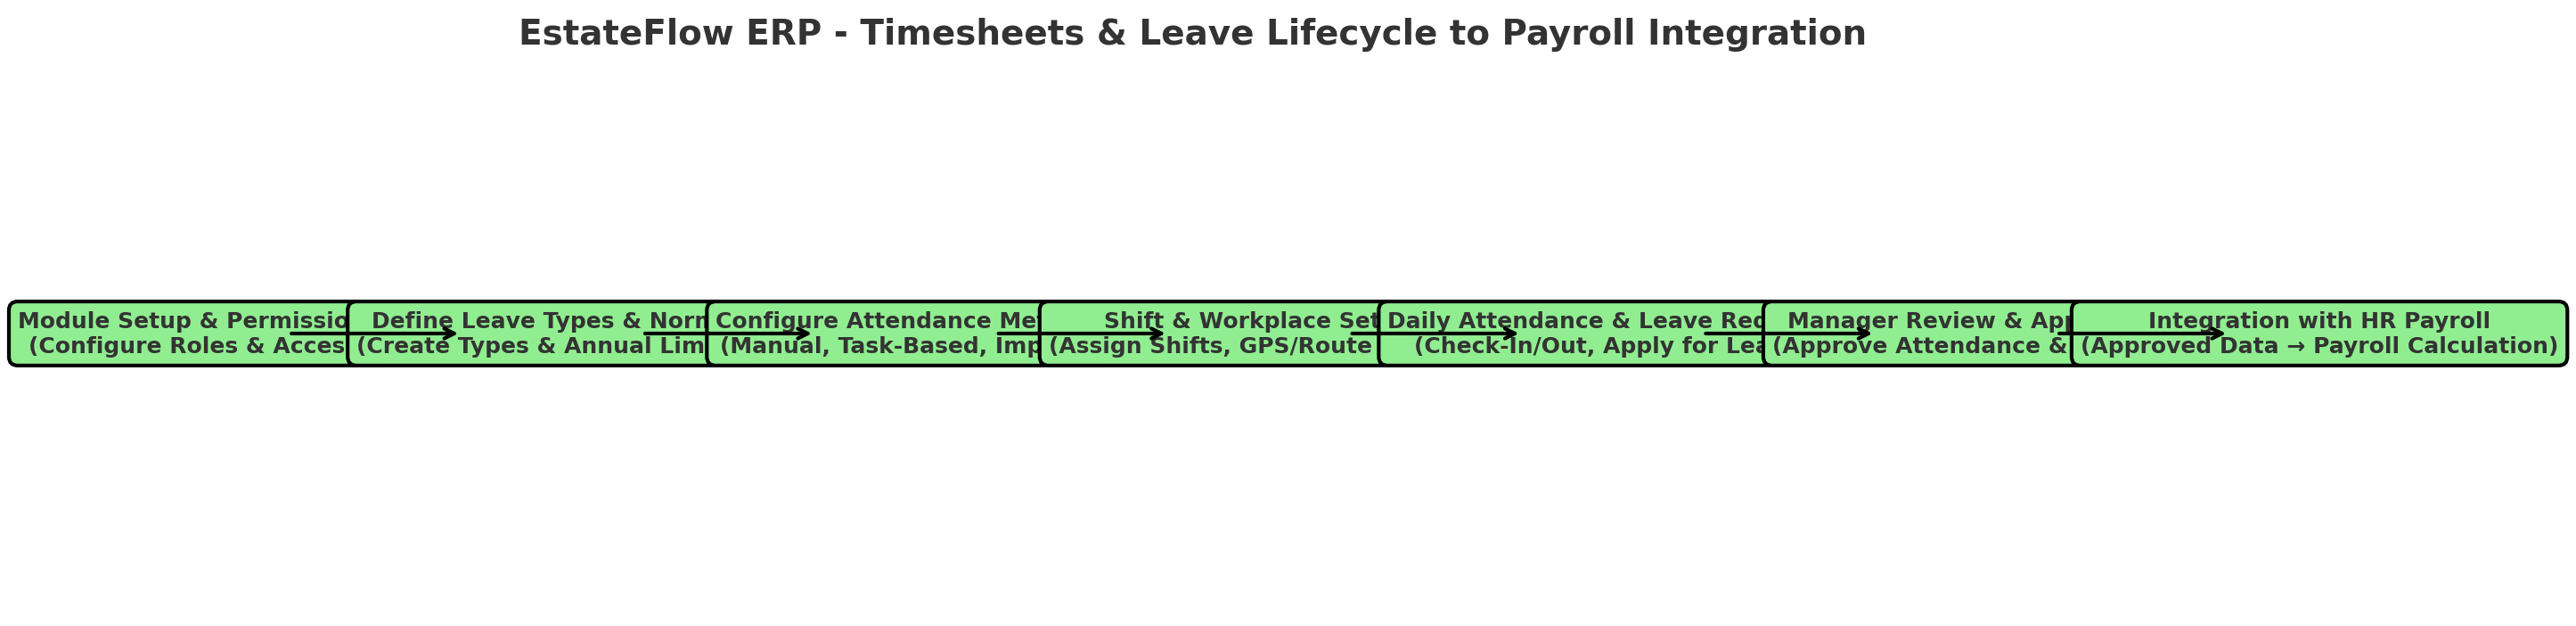
The Timesheets & Leave Management Module in EstateFlow ERP centralizes all employee attendance, time tracking, leave management, and work scheduling activities. It integrates seamlessly with:
-
HR Records Module – for staff details, department assignments, and manager-linked permissions.
-
HR Payroll Module – for payroll calculation based on actual hours, overtime, and leave deductions.
-
Construction Orchestrator Module – to align timesheet data with task-based time tracking on project sites.
This module supports multiple timekeeping methods, automated leave cycle management, flexible permissions, and detailed reporting — enabling accurate, real-time workforce management for office, field, and remote teams.
[Insert Screenshot: Dashboard Overview]
Key Features & Benefits
Features
-
Role-based and individual permissions for timekeeping and leave management.
-
Multiple attendance tracking options: manual, task-based, or CSV/Excel import.
-
GPS-based workplace attendance and route-based check-ins.
-
Configurable leave types, annual leave cycles, and norms.
-
Shift categories, shift assignments, and work shift tables.
-
Public holiday and special break scheduling.
-
IP-based attendance restrictions.
-
Integrated reporting with drill-down filters.
-
Integration with HR Payroll for automated pay calculation.
Benefits
-
Reduces time fraud with GPS and IP restrictions.
-
Increases operational efficiency with automated shift and leave cycle management.
-
Improves accuracy of payroll processing.
-
Enhances compliance by maintaining detailed attendance and leave records.
-
Supports multi-site and mobile workforce attendance.
Pre-Requisites & Access Rights
-
Modules Required: HR Records, HR Payroll (optional), Construction Orchestrator (optional for task-based timekeeping).
-
Permissions Required: Configured under Settings → Permissions in the Timesheets & Leave module.
-
User Roles:
-
Admin – Full access to all module features and settings.
-
Manager – Access to attendance and leave data for their managed employees (linked from HR Records).
-
Staff – Restricted to their own attendance and leave requests unless granted global permissions.
-
Step-by-Step Instructions
1. Configuring Permissions
-
Go to Timesheets & Leave → Settings → Permissions.
-
Click Add.
-
Assign permissions by Role or Staff Name.
-
Select the applicable options:
-
Timesheet – Attendance – View (Own / Global)
-
Timesheet – Leave – View (Own / Global)
-
Work Routes – View (Own / Global)
-
Additional Work Hours – View / Create
-
Work Shift Table – View / Global
-
Report – View / Global
-
Workplace Management – View / Global
-
-
Click Save.
[Insert Screenshot: Permissions Setup]
2. Creating Leave Types
-
Go to Settings → Type of Leave → New.
-
Enter:
-
Type of Leave (e.g., Sick Leave, Annual Leave)
-
Character Code (short code used in attendance view)
-
-
Click Save.
3. Setting Up Timesheet Method
-
Go to Timesheets & Leave → Settings → Timesheets Settings.
-
Select Timesheet Form:
-
Manual Timesheets – Check-in/out buttons appear.
-
Timesheet by Tasks – Hours calculated from task entries in Construction Orchestrator.
-
Import Timesheets – Upload CSV/Excel.
-
-
Assign applicable Roles.
-
Configure Attendance Settings, Google Map API Key, and Leave Cycle Start Month.
4. Managing Shifts
-
Create Shift Categories:
-
Go to Shift Categories → Add.
-
Enter Name, Color, Start/End times, Lunch breaks.
-
-
Create Shifts:
-
Go to Shifts → New.
-
Assign Departments, Roles, and Staff.
-
Link Shift Category.
-
Set repeat schedule.
-
-
View assignments in Work Shift Table.
5. Configuring Workplaces & Routes
-
Workplaces:
-
Go to Workplace → Add.
-
Enter Name, Address, GPS Coordinates, and Radius.
-
Assign to staff in Workplace Allocation.
-
-
Routes:
-
Go to Work Routes → Route Points → Add.
-
Set Name, Link to Customer or Workplace, Address, GPS Coordinates, Radius.
-
Assign routes in Route Tab.
-
6. Managing Holidays
-
Go to Settings → Holidays → New.
-
Enter Day Off, Leave Type, Reason, Department/Role (optional), and Recurrence.
-
Click Save.
7. Leave Norms Configuration
-
Go to Settings → Norms of Leave.
-
Select Leave Type, Cycle Start Month, and Maximum Days.
-
Click Save.
8. Attendance Operations
-
By Workplace:
-
Enable “Allow Attendance by Coordinates”.
-
Assign Workplace to Staff.
-
Staff checks in/out within radius via mobile.
-
-
By Route:
-
Enable “Allow Attendance by Route”.
-
Assign Route Points and Routes to Staff.
-
9. Integration with Other Modules
-
HR Records – Manages employee profiles, roles, and managers for permissions.
-
HR Payroll – Pulls approved attendance and leave data to calculate wages.
-
Construction Orchestrator – Enables project task-based timekeeping.
Tips & Best Practices
-
Always keep GPS coordinates accurate for workplaces and route points.
-
Align leave cycle start with your company’s financial year for better payroll alignment.
-
Use Global View permissions sparingly to protect sensitive data.
-
Enable Auto Checkout to avoid incomplete attendance records.
Troubleshooting & Common Issues
-
"Location Information is Unknown" – Staff not assigned a workplace or route.
-
"Route Point is Unknown" – Assigned route missing for the day.
-
Access Denied during Check-In – IP not in allowlist or outside GPS radius.
-
Timesheets not Calculating Hours – Task-based timekeeping requires active Construction Orchestrator tasks.
Glossary & Notes
-
Work Shift Table – Monthly view of all shifts per employee.
-
Norms of Leave – Policy rules defining leave limits per year.
-
Global View – Access to all employees’ data, regardless of role.